 BEAUTY IN EVERY DETAIL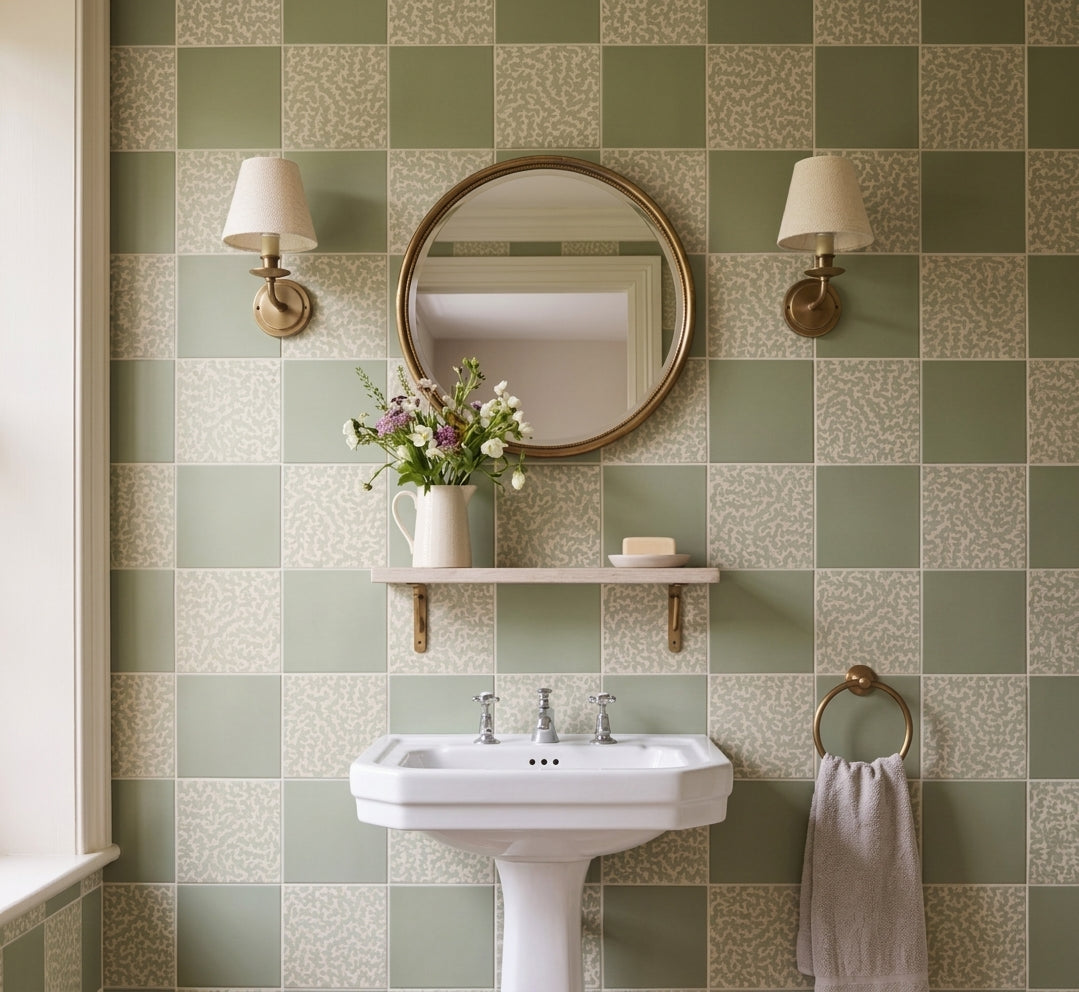
Tiling can make or break a space. It has the potential to transform a dull room into a stunning masterpiece with the right arrangements. Did you know that accurate measurements are crucial for avoiding costly installation errors? However, most people overlook this first vital step. The surprising truth is that proper planning and precise arrangements can elevate your tiling project from average to exceptional, creating a professional finish that stands the test of time.

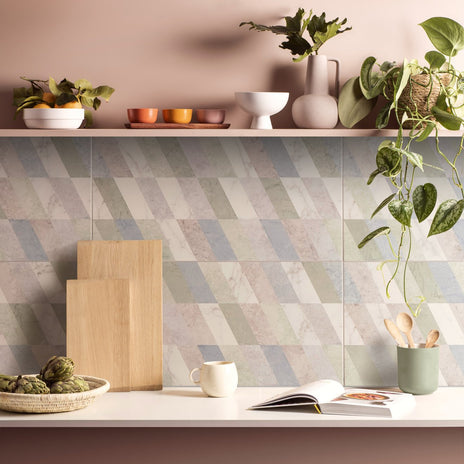
Our Nina Campbell Goa Indigo Chocolate tiles are made from glazed porcelain and offer a playful way to experiment with layout. Try rotating each 20cm square tile as you work to create a more dynamic, characterful pattern across the wall or floor.
Key Points
- Accurate Measurements are Crucial: Measure your space and tiles precisely to avoid installation errors. Calculate total square meterage for tile quantity and understand space requirements such as durability and moisture resistance.
- Plan Your Layout Thoughtfully: Identify focal points in your room and choose appropriate tile patterns. Using technology and visual aids can help visualise potential designs before implementation.
- Precision in Tile Arrangement is Key: Establish a starting point and create a precise layout grid using chalk lines. Dry laying tiles allows you to confirm patterns and adjust spacing before adhering them down.
- Choose the Right Grout: Selecting the appropriate grout type is essential for the longevity and appearance of tiles. Consider colour to match or contrast with tile aesthetics.
- Finishing Touches Enhance Quality: Seal grout, apply silicone caulk at joints, and clean the surface to achieve a polished, professional result.
Assess Your Space and Tiles
Before you start arranging tiles, take time to thoroughly assess both your space and the tiles you plan to use. This critical first step lays the foundation for a successful tiling project. A thoughtful assessment prevents costly mistakes and ensures the finished result meets your expectations.
Measuring Your Space

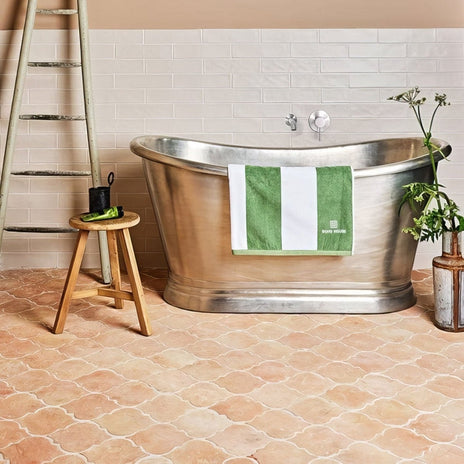
Our Marlborough Terracotta Arabesque tiles are handmade from natural terracotta, with a distinctive curved shape that creates plenty of movement. Arranging the tiles in a repeating pattern allows the arabesque shape to become the main feature of the room.
The first task in assessing your space is taking accurate measurements. Get a measuring tape and note down the dimensions of the area you plan to tile. Measure the length and width of the floor or walls, and don't forget to account for any irregular shapes, alcoves, or built-in features.
Remember to measure twice to confirm accuracy. Even small measurement errors can lead to significant problems during installation. Once you have your measurements, calculate the total square meterage of the area to determine how many tiles you'll need.
Consider the specific characteristics of your space. Is it a high-traffic area that needs durable tiles? Is it a wet area requiring water-resistant materials? Understanding these aspects helps you choose the right tiles and arrangement pattern.

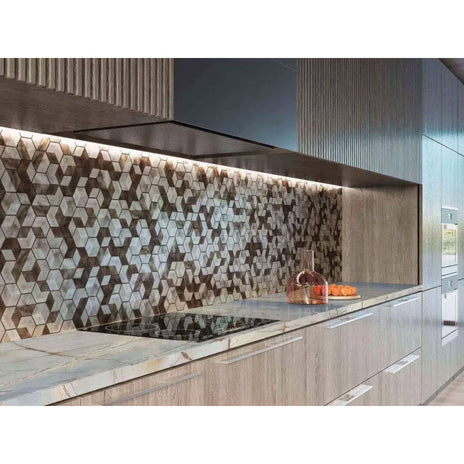
Our Future Amber Mosaic tiles are made from glossy glass and are supplied on sheets, making them an easy way to introduce a rich, shimmering pattern to a wall. The individual mosaic pieces create a beautifully varied surface, while keeping the sheets aligned helps the overall arrangement feel seamless.
According to Porcelanosa, "complete rectangular tiles laid in a 45° pattern on walls can be either horizontally or vertically aligned to emphasise the height or width of the space." This insight can be particularly useful when deciding how to arrange tiles in rooms that appear too narrow or have low ceilings.
Evaluating Your Tiles
Once you've assessed your space, turn your attention to the tiles themselves. Examine them for several important characteristics:
- Size and shape: Are they square, rectangular, hexagonal, or another shape? The dimensions will influence your layout options.
- Material: Different materials have different properties. Ceramic, porcelain, natural stone, and vinyl each require specific installation approaches.
- Weight: Heavier tiles may need additional adhesive or support, especially on walls.
- Pattern or design: Patterned tiles need careful arrangement to ensure the design flows correctly.
- Colour variation: Natural materials often have shade variations that should be distributed evenly.
For 2026 and beyond, natural stone tiles are emerging as a popular trend in UK homes. As noted by Druston, these tiles offer "unique veining and rich textures that add depth and warmth" and work "beautifully in bathrooms, kitchens, and entryways."
Planning Your Layout
With your space measured and tiles evaluated, you can start planning your layout. Begin by determining the focal point of the room — the area that naturally draws attention. In a bathroom, this might be the shower area; in a kitchen, it could be the cooking zone.
Consider how people will move through the space. The pattern should guide the eye and enhance the room's flow. For instance, diagonal patterns can make small spaces appear larger, while grid patterns create a sense of order and simplicity.
Draw a scale diagram of your space and experiment with different tile arrangements. Don't forget to account for grout lines, which will add to the overall coverage area.
Take time to lay some tiles out on the floor in different patterns before committing. A physical mock-up gives you a tangible sense of how the finished project will look and helps identify any potential issues before installation begins.
Plan Layout and Pattern Design

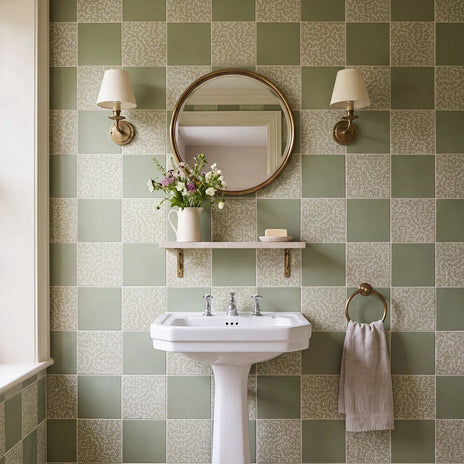
Our Sanderson Truffle Sage and Plain Sage tiles are made from porcelain and feature a small-scale patterned and plain design. Laying them in a simple grid allows the motif to read as an overall texture, while keeping the arrangement calm and cohesive across a larger area.
Once you've assessed your space and tiles, the next crucial step is to plan your layout and pattern design. This stage transforms your project from a simple tiling job into a thoughtful design statement that enhances your space.
Understanding Basic Tile Patterns
- Grid Pattern (or stack bond): Clean, modern look. Ideal for contemporary spaces or patterned tiles.
- Running Bond (or brick pattern): Tiles offset by half their length. Versatile for most spaces.
- Herringbone: Tiles placed at 45° or 90° angles creating a zigzag effect. Adds movement and sophistication.
- Basketweave: Alternating vertical and horizontal tile pairs. Works beautifully in period properties.
- Windmill: Large square tile surrounded by smaller rectangular tiles. Creates a focal point in larger areas.

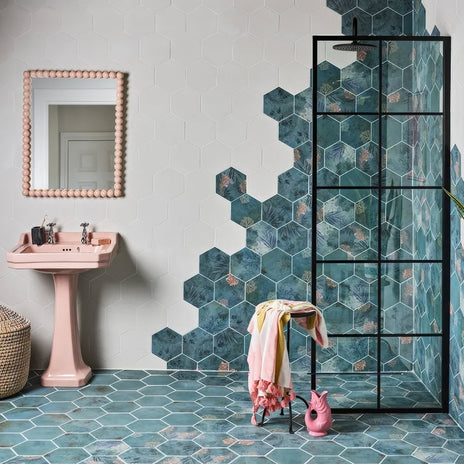
Our Mermaid's Garden tiles are made from porcelain and feature a distinctive hexagonal shape with an intricate botanical design. They can be laid independently for a bold patterned surface or combined with plain hexagonal tiles to create a flowing, more considered arrangement.
Considering Tile Direction
The direction in which you lay your tiles significantly impacts the perception of your space. Horizontal arrangements tend to make rooms appear wider, while vertical arrangements can make ceilings seem higher. Diagonal arrangements create a sense of expansiveness but require more cutting and generate more waste.
Creating Focal Points and Borders

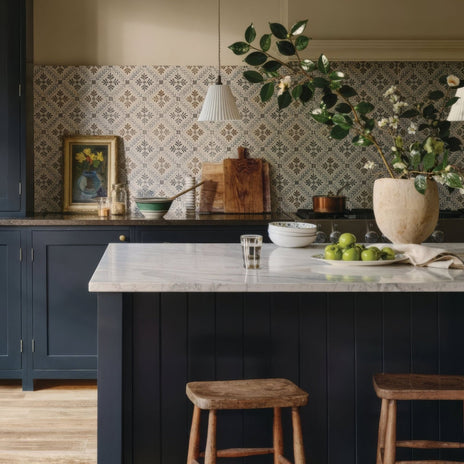
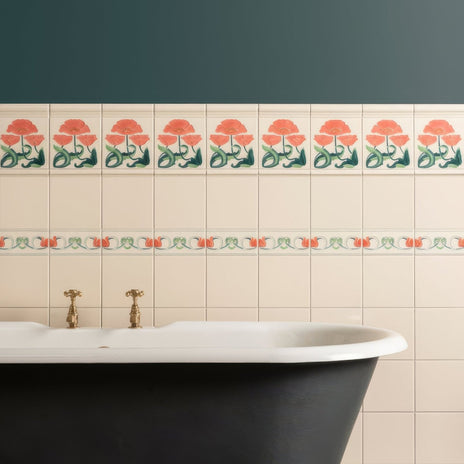
Our County White Field tiles and Moulin Rouge Tube-Lined tiles work beautifully together — use the plain tiles to create a simple grid around the patterned tiles, or repeat the decorative tiles at regular intervals for a more considered arrangement.
Thoughtful layout planning allows you to create focal points by changing the pattern in a defined area, using accent tiles in strategic locations, or creating a "rug" effect with decorative tiles surrounded by plain ones. Borders work particularly well in traditional settings or to frame feature areas.
Balancing Aesthetics and Practicality

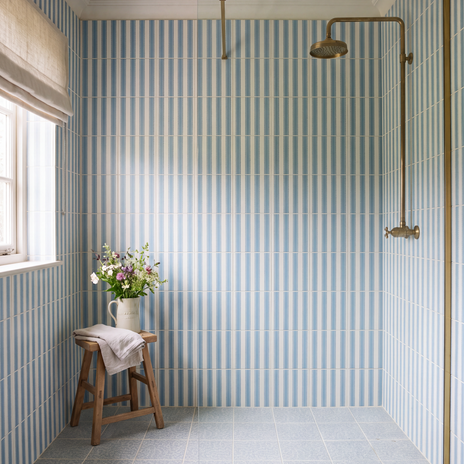
Our Sanderson Pinetum Stripe Dove Blue tiles feature a delicate vertical stripe. Consider rotating the tiles to change the direction of the stripes, creating subtle variations in the overall pattern while maintaining a sophisticated feel.
While aesthetics are important, practical considerations must also guide your pattern choice. Complex patterns require more tiles, take longer to install, generate more waste, and need more skill to execute. Balance your design aspirations with practical constraints like budget, timeline, and installation complexity.
💡 Design Tip: Before committing to a tile pattern, order samples and lay them out dry in your actual space. Tile colours and textures can look dramatically different depending on the room's natural light, scale, and surrounding finishes — what works beautifully in a showroom may feel very different once you're living with it.
Common Tile Layout Patterns: Quick Reference
| Pattern | Visual Effect | Best For | Skill Level |
|---|---|---|---|
| Grid / Stack Bond | Clean, orderly, modern | Contemporary spaces, patterned tiles, large formats | Beginner |
| Running Bond / Brick | Classic, versatile, subtle movement | Most spaces, rectangular tiles, kitchens and bathrooms | Beginner–Intermediate |
| Herringbone | Dynamic, sophisticated, directional | Hallways, feature walls, bathroom floors | Intermediate |
| Basketweave | Woven, traditional, textured | Period properties, bathroom floors | Intermediate |
| Diagonal / 45° | Expansive, makes rooms feel larger | Small rooms, square tiles, feature floors | Intermediate–Advanced |
Mark and Arrange Tiles Precisely
Precision is the hallmark of professional-looking tile work. Even the most beautiful tiles can look amateurish if they're arranged haphazardly.
Finding Your Starting Point

Our South Beach Collins tiles are made from ceramic and their larger 60 x 30cm format makes them particularly effective when the direction of the design is carefully considered. Keeping the pattern consistently aligned creates a strong geometric effect.
Before placing a single tile, establish your starting point. For most rooms, the centre point is ideal — it allows you to work outward symmetrically, distributing cut tiles evenly around the perimeter. Find the centre by snapping chalk lines from the midpoint of opposite walls and working from their intersection.
According to Porcelanosa, "perfectly aligned grouting joints in either vertical or horizontal arrangements create clean, modern looks in bathrooms and kitchens."
Creating a Precise Layout Grid
Create a layout grid using chalk lines to keep tiles straight and properly spaced. Ensure your layout lines are perfectly square using the 3-4-5 triangle method: measure 3 units along one line, 4 units along the perpendicular, and the diagonal between those two points should be exactly 5 units. If it isn't, adjust until you have perfect right angles.
Dry Laying: The Essential Trial Run
Before applying any adhesive, arrange your tiles in a dry layout to verify the pattern, adjust spacing, identify where cuts are needed, and check that perimeter cuts look balanced. For natural stone tiles, dry laying is particularly important so complementary veining patterns flow seamlessly from tile to tile.
Using Tile Spacers Effectively
- Select the appropriate size (typically 2–3mm for wall tiles and 3–5mm for floor tiles)
- Place spacers at each corner where tiles meet
- For large format tiles, add additional spacers along the edges
- Remove spacers before the adhesive fully sets but after tiles are stable
Managing Cuts and Transitions
- Use a square and pencil to mark precise cutting lines
- Double-check measurements before cutting
- Position cut edges against walls where they'll be less noticeable
- For doorways and transitions, plan your layout so cuts look intentional
Working with Patterns and Features
- Lay out the entire pattern before adhering any tiles
- Take photos of your dry layout for reference
- Number the backs of tiles if necessary to maintain the pattern
- Work from the centre of feature areas outward
Tile Grouting and Finishing Tips

Our Luminous Lume Green tiles are made from porcelain in a slim 6 x 24cm brick format, ideal for experimenting with different orientations. Lay them in a traditional horizontal brick bond, stack them vertically, or try a more unexpected arrangement to change the feel of the space.
Grouting is the final crucial step that transforms individual tiles into a cohesive, finished surface. Proper grouting and finishing techniques are vital for both appearance and longevity.
Selecting the Right Grout
Cement-based grout is the most common type. Sanded grout suits wider joints (over 3mm); unsanded grout works best for narrow joints (under 3mm). Epoxy grout offers superior stain resistance and doesn't require sealing — ideal for kitchens, bathrooms, and high-traffic areas. When choosing grout colour, contrasting grout highlights the tile pattern while matching grout creates a seamless look.
Preparing for Grouting
- Ensure all adhesive is completely dry — typically 24–48 hours after tile installation
- Remove all spacers between tiles
- Clean any adhesive residue from the tile surfaces and joints
- Vacuum the tiled area to remove dust and debris
Applying Grout Effectively
- Work in manageable sections of approximately 1–2 square metres at a time
- Hold your grout float at a 45-degree angle to the tile surface
- Press the grout firmly into the joints with diagonal strokes
- Work in different directions to ensure complete coverage
Cleaning Excess Grout
- Allow the grout to firm up slightly (usually 15–30 minutes)
- Use a damp sponge to remove excess grout with light, diagonal strokes
- Rinse the sponge frequently in clean water
- Avoid using excessive water, which can weaken the grout
- After initial cleaning, allow another 30–60 minutes before polishing off any remaining haze with a dry cloth
Sealing Grout for Longevity
Unless you've used epoxy grout, sealing is essential. Allow the grout to cure fully (typically 72 hours), then apply a high-quality penetrating sealer. For areas with heavy water exposure, consider resealing annually.
Finishing Touches
- Install appropriate trim pieces to cover exposed tile edges
- Apply silicone caulk where tiles meet other surfaces to allow for movement and prevent water ingress
- Clean the entire tiled surface with a pH-neutral cleaner once the grout has fully cured
Frequently Asked Questions
How do I measure my space for tiling?
Use a measuring tape to determine the length and width of the area you plan to tile, accounting for any irregular shapes or alcoves. Measure twice to ensure accuracy, and calculate the total square meterage to determine how many tiles you'll need.
What is the best tile pattern for a small room?
For small rooms, diagonal or grid patterns can create an illusion of more space. Diagonal arrangements can make the room feel larger, while grid patterns provide a clean, modern look.
How can I create a focal point with tiles?
Change the tile pattern in a specific area, use accent tiles in contrasting colours or textures, or create a "rug" effect with decorative tiles surrounded by plain ones. Consider accentuating areas like a shower or behind a sink.
What type of grout should I use for my tiles?
Cement-based grout suits most applications, while epoxy grout offers superior stain resistance for wet or high-traffic areas. Match the grout type to the tile joints and consider colour for aesthetic appeal.
Unlock Your Perfect Tiling Project with Hyperion Tiles
At Hyperion Tiles, we understand the challenges of tiling — from choosing the right materials to ensuring a seamless layout that resonates with your design vision. Explore our extensive selection of top-quality tiles for bathrooms, kitchens, and more at hyperiontiles.co.uk and transform your tiling ambitions into reality.
Share:
NOW ON! Our Fired Earth tiles Easter sale
Top Porcelanosa tiles | enhance your home with our new collection