
What Is Floor Tiling? A Simple Guide For Beginners

Floor tiling is a powerful way to elevate your home. It can completely change the way a space looks and feels. In fact, well-installed tiles can last for decades, adding immense value to your property. But here’s the kicker: many people overlook the complexity behind what seems like a straightforward job. Because mastering floor tiling involves understanding materials, patterns, and even subfloor conditions.
Understanding Floor Tiling Basics
Floor tiling stands as one of the most transformative home improvement projects, dramatically enhancing both the functionality and aesthetic appeal of any space. But what exactly is floor tiling? At its core, floor tiling involves installing individual tiles over a prepared subfloor to create a durable, attractive surface. This process combines technical skill with artistic elements to produce results that can last for decades with proper installation and maintenance.
What Constitutes Tile Flooring
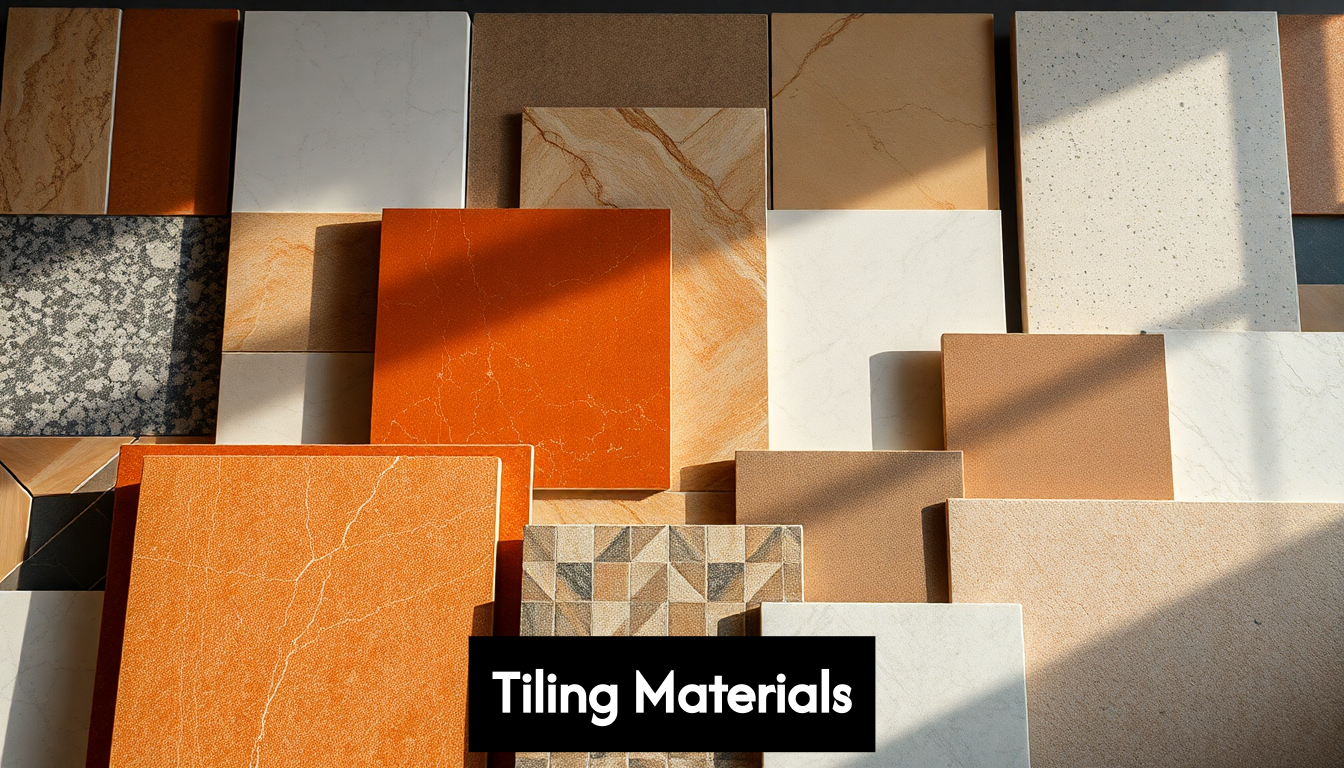
Tile flooring refers to any floor covering made up of individual units (tiles) arranged in a pattern and secured to the underlying surface. These tiles can be manufactured from various materials including ceramic, porcelain, natural stone, glass, and even certain resilient materials like vinyl or cork. Each material offers unique properties in terms of durability, water resistance, maintenance requirements, and visual appeal.
Ceramic and porcelain tiles remain particularly popular choices for British homes due to their exceptional durability and moisture resistance. Porcelain, being denser and less porous than ceramic, offers superior water resistance—making it ideal for bathrooms, kitchens, and other areas prone to moisture. Natural stone tiles like marble, granite, and slate provide unmatched elegance but typically require more maintenance and sealing to protect their porous surfaces.
The Anatomy of a Tiled Floor
A properly installed tile floor consists of several distinct layers, each serving a crucial purpose:
- Subfloor – The structural foundation that supports everything above it
- Underlayment – A smooth, level surface that provides stability for the tiles
- Adhesive – Typically thinset mortar or mastic that bonds tiles to the underlayment
- Tiles – The visible finished surface material
- Grout – The material filling joints between tiles, providing stability and finished appearance
Understanding these components is essential whether you’re planning a DIY tile installation or communicating effectively with professional tilers. The quality of each layer significantly impacts the longevity and appearance of your finished floor.
Key Considerations Before Tiling
Before embarking on any floor tiling project, several factors demand careful consideration. The subfloor condition serves as the foundation for success—any existing damage or unevenness must be addressed before proceeding. Floor height changes after tiling can affect door clearances and transitions to other flooring materials. The intended room usage also influences material selection; high-traffic areas require more durable options than rarely used spaces.
The tile layout pattern significantly impacts both installation complexity and visual appeal. Standard patterns include straight (grid), offset (brick), herringbone, and diagonal arrangements. Each pattern creates a distinct visual effect and can make spaces appear larger or more intimate depending on the arrangement. Smaller formats such as mosaic tiles can also introduce pattern and texture, particularly in compact spaces.
Weight considerations also play a crucial role, particularly in upper-floor installations or older properties. Stone tiles, for instance, can weigh significantly more than ceramic options, potentially necessitating structural reinforcement in some scenarios.
Understanding these floor tiling basics provides the foundation for successful project planning and execution, whether you’re hiring professionals or taking the DIY approach to transforming your home’s flooring.
Key Takeaways
| Takeaway | Explanation |
|---|---|
| Understand Tile Types | Familiarise yourself with various tiling materials, such as ceramic, porcelain, and natural stone, to choose the best option based on durability, water resistance, and maintenance needs for your space. |
| Prepare the Subfloor | Ensure the subfloor is clean, dry, and level before installation to prevent future issues with tile stability and appearance. Consider using self-levelling compounds for uneven areas. |
| Plan Your Layout | Carefully plan the tile layout to minimise awkward cuts and enhance visual appeal. Starting from a defined point, such as the room centre, can create a balanced final look. |
| Check Adhesive Application | Apply the adhesive evenly without leaving voids, and work in manageable sections to ensure proper bonding before the adhesive dries. |
| Anticipate Common Challenges | Be prepared for challenges like uneven subfloors or grout issues by understanding troubleshooting methods and being proactive in your approach during the tiling process. |
Exploring Tiling Materials & Options
When it comes to floor tiling, the material you select forms the foundation of your project’s success. Each tiling material brings its own unique blend of aesthetic appeal, durability, maintenance requirements, and cost considerations. Understanding these differences helps you make informed decisions that align with both your design vision and practical needs.
Ceramic and Porcelain Tiles
Ceramic tiles represent one of the most popular and versatile options for floor tiling projects. Made from clay that’s been kiln-fired at high temperatures, ceramic tiles offer reasonable durability at an affordable price point. They come in countless colours, patterns, and finishes, making them suitable for virtually any design aesthetic.
Porcelain, a subset of ceramic tiles, is crafted from more refined clay and fired at even higher temperatures. This results in a denser, less porous product with superior water resistance and durability. While generally more expensive than standard ceramic options, porcelain’s exceptional hardness makes it ideal for high-traffic areas and rooms exposed to moisture, such as kitchens and bathrooms.
Both ceramic and porcelain tiles can be glazed or unglazed. Glazed tiles feature a protective layer that enhances water resistance and allows for virtually unlimited design possibilities, from solid colours to intricate patterns. Unglazed tiles, while more limited in appearance, often provide better slip resistance and a more natural aesthetic.
Natural Stone Options
For homeowners seeking timeless elegance, natural stone tiles deliver unparalleled beauty with unique variations in each piece. Popular stone options include:
- Marble – Luxurious with distinctive veining patterns, though relatively soft and porous
- Granite – Extremely durable with natural speckled patterns and excellent resistance to staining
- Slate – Offers natural texture with earthy tones and excellent slip resistance
- Travertine – Features a warm, natural appearance with distinctive pitted surfaces
While stone tiles undeniably enhance a space’s aesthetic value, they typically require more maintenance than manufactured alternatives. Most natural stone needs regular sealing to prevent staining and moisture penetration. They also tend to be more expensive both in material cost and installation complexity. Designer ranges such as our Ca'Pietra tiles showcase just how striking natural stone can look on a floor.
Modern Alternative Tile Materials
Beyond traditional options, modern manufacturing has introduced innovative flooring alternatives that mimic the appearance of conventional materials while addressing some of their limitations.
Luxury vinyl tiles (LVT) have gained significant popularity due to their remarkable ability to replicate the look of stone or wood while offering superior water resistance, warmth underfoot, and simplified installation. They provide an excellent middle ground between appearance and practicality.
Quartz composite tiles combine ground quartz with resins to create extraordinarily durable surfaces resistant to scratching and staining. These engineered options often provide more consistent colouration than natural materials while requiring minimal maintenance.
Research shows that the arrangement and size of tiles can significantly impact mechanical properties like stiffness and load-carrying capacity. This suggests that when planning your floor, considering not just the material but also the tile size and layout pattern can affect the floor’s overall durability and performance.
Special Consideration Tiles
Beyond standard decorative concerns, some tiling projects require materials with specific performance characteristics:
For outdoor applications, frost-resistant tiles prevent cracking during freezing temperatures. These specially formulated options maintain their integrity despite temperature fluctuations and exposure to elements.
In commercial or high-traffic residential areas, slip-resistant tiles with textured surfaces reduce fall risks, particularly in areas prone to moisture. These tiles typically feature raised patterns or special glazes that provide traction even when wet.
Radiant heating compatibility represents another important consideration for modern installations. Some materials conduct and retain heat more effectively, maximising the efficiency of underfloor heating systems. Porcelain and certain natural stones typically perform well in this regard, while vinyl options may limit heat transfer efficiency.
By thoroughly exploring the full spectrum of tiling materials and options available, you can select the perfect combination of beauty, performance, and value for your specific floor tiling project.
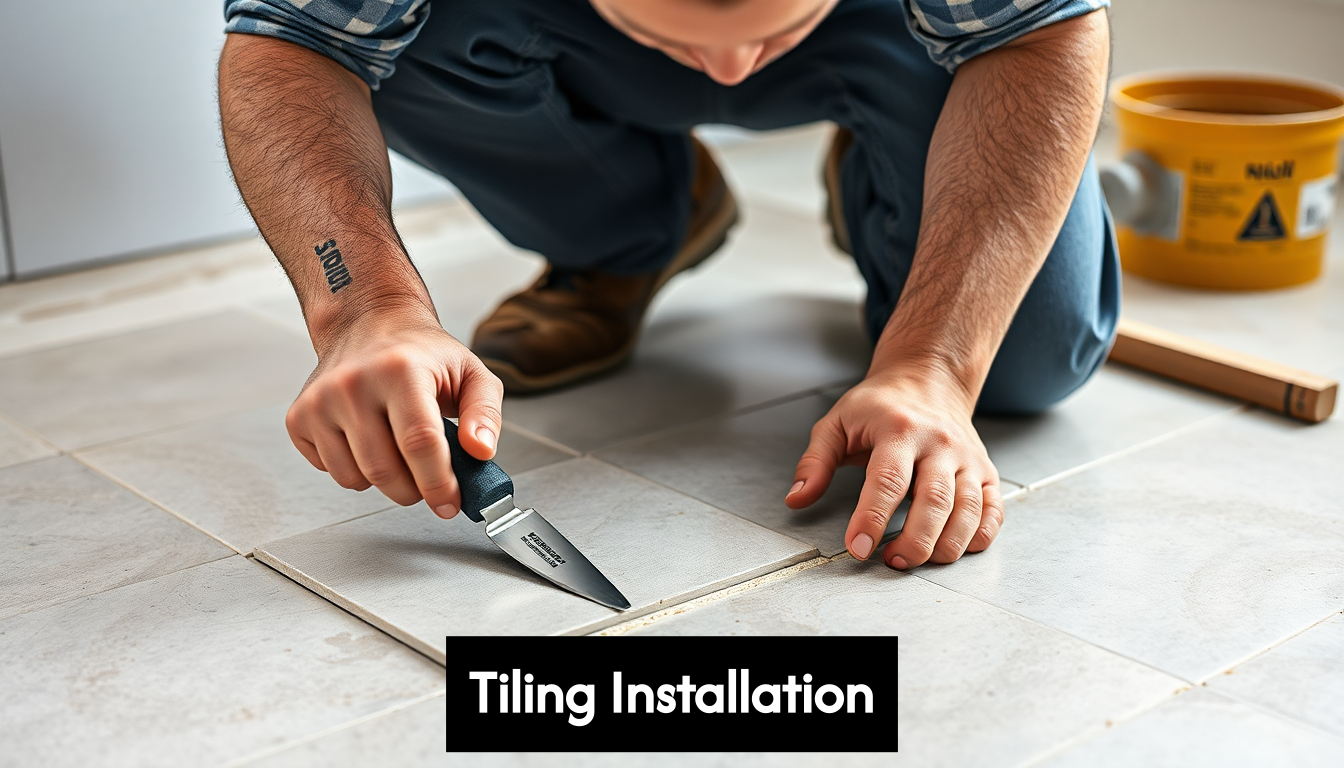
Step-by-Step Floor Tiling Installation
Transforming your space with tile flooring is a rewarding DIY project that can dramatically enhance your home’s value and appearance. While the tile laying process requires patience and precision, breaking it down into manageable stages makes it accessible even for first-time tilers. This comprehensive guide walks you through each phase of floor tile installation, from initial planning to final finishing touches.
Preparation and Planning
Successful floor tiling begins long before the first tile touches adhesive. Proper preparation creates the foundation for a professional-looking result that will stand the test of time.
Start by thoroughly clearing and cleaning the area. Remove all furniture, existing floor coverings, and debris. The subfloor must be completely clean, dry, and structurally sound before proceeding. Any cracks, holes, or uneven areas require repair and levelling compounds to create a smooth surface.
Next, calculate the materials needed. Measure your room’s length and width, then multiply these figures to determine the square footage. Add 10-15% extra for cutting waste and potential future repairs. This calculation helps determine the quantity of tiles, adhesive, grout, and other materials required for your project.
Plan your tile layout carefully to minimise awkward cuts and create visual balance. As experienced tilers recommend, finding the centre point of your floor and working outwards often yields the most aesthetically pleasing results. For rectangular rooms, you might start with a dry layout (placing tiles without adhesive) from the centre of the main entrance wall, ensuring cut tiles around the perimeter are roughly equal in size.
Essential Tools and Materials
Gathering the right tools and materials before starting saves time and frustration during installation. Here’s what you’ll need:
- Tiles – Your chosen floor tiles plus extra for contingency
- Adhesive – Appropriate for your tile type and subfloor material
- Grout – Matching or contrasting with your tiles as desired
- Spacers – To ensure consistent grout lines
- Notched trowel – For applying adhesive evenly
- Tile cutter – Manual score-and-snap type or wet saw for harder materials
- Rubber mallet – For gently tapping tiles into position
- Spirit level – To check for levelness during installation
- Measuring tape and marking tools – For accurate layout planning
- Grout float – For applying grout between tiles
- Sponges and buckets – For cleanup during grouting
- Knee pads – To protect your knees during long periods of kneeling
Subfloor Preparation
The condition of your subfloor dramatically impacts the longevity and appearance of your tiled floor. Different subfloor materials require specific preparation techniques.
Concrete subfloors should be fully cured (at least 28 days old) and tested for moisture content before tiling. Excessive moisture can prevent proper adhesion and cause tiles to lift later. Apply a concrete sealer if moisture is a concern. Repair any cracks with appropriate concrete filler and ensure the surface is level, using self-levelling compound for uneven areas.
Wooden subfloors require additional consideration as they naturally flex more than concrete. Install cement backer board over plywood subfloors to provide a stable, rigid surface for tiling. Secure the backer board with appropriate screws at recommended intervals, staggering the joints to maximise stability.
Applying Adhesive and Setting Tiles
Once your subfloor is properly prepared, begin applying adhesive in manageable sections of approximately one square metre. This prevents the adhesive from drying before you can set tiles. Use the notched trowel to create consistent ridges in the adhesive, holding the trowel at a 45-degree angle for optimal coverage.
Place your first tile at your predetermined starting point (typically the centre of the room or main entrance wall), pressing it firmly into the adhesive with a slight twisting motion to ensure good contact. Add tile spacers at each corner to maintain consistent grout lines. Continue placing tiles in your planned pattern, checking periodically with a spirit level to ensure the surface remains flat and even.
For tiles that require cutting to fit around obstacles or at room edges, measure carefully and mark the cutting line clearly. Use a tile cutter for straight cuts or a wet saw for more complex shapes. Always wear appropriate safety gear when cutting tiles, including eye protection and gloves.
Allow the adhesive to cure according to the manufacturer’s instructions, typically 24-48 hours, before walking on the newly tiled floor or proceeding to grouting. During this time, avoid disturbing the tiles to prevent shifting or uneven setting.
By following these methodical steps and paying attention to detail throughout the process, you’ll be well on your way to achieving a professional-quality tiled floor that enhances your home for years to come.
Troubleshooting Common Tiling Challenges
Even with meticulous planning and careful execution, floor tiling projects can present unexpected challenges. Understanding how to identify and resolve these issues ensures your project stays on track and results in a professional finish. This section addresses the most common tiling challenges and provides practical solutions to overcome them.
Uneven Subfloors and Surface Preparation Issues
Uneven subfloors rank among the most prevalent challenges in tile installation. When tiles are laid over an irregular surface, they can rock or create lippage (height differences between adjacent tiles), compromising both appearance and durability.
If you discover subfloor irregularities before tiling begins, apply self-levelling compound to create a flat, even foundation. Follow the manufacturer’s instructions carefully regarding mixing ratios and drying times. For minor dips and depressions, you can use additional adhesive to build up these areas during installation.
When unevenness becomes apparent only after some tiles have been laid, you face a more complex situation. For minor lippage, you might carefully remove affected tiles, adjust the adhesive bed, and reset them. For more significant problems, unfortunately, starting over with proper floor preparation may be the only reliable solution.
Moisture problems in subfloors present another critical preparation challenge. If you notice damp patches, efflorescence (white, powdery deposits), or musty odours, address the source of moisture before proceeding. Depending on severity, solutions range from improved ventilation to applying moisture barriers or waterproofing membranes.
Adhesive Application Problems
Improper adhesive application causes numerous tiling failures. “Spot bonding” (applying adhesive only at corners or in the centre of tiles) creates voids that make tiles vulnerable to cracking when weight is applied. Always ensure complete coverage by using the correct notched trowel and applying adhesive evenly across the entire tile back.
Adhesive that dries too quickly before tiles are set (known as “skinning over”) prevents proper bonding. This typically occurs when working in hot, dry conditions or when covering too large an area at once. Work in smaller sections (about one square metre at a time) and periodically check adhesive consistency by touching it with a fingertip. If adhesive no longer sticks to your finger, scrape it off and apply fresh material.
Conversely, if tiles shift or sink after placement, you may be using adhesive that’s too wet or thin. Follow manufacturer recommendations for consistency and allow proper mixing time for powdered adhesives to reach their optimal thickness.
Cutting and Fitting Challenges
Precise cutting becomes particularly challenging around irregular shapes, plumbing fixtures, and corners. For complex cuts, create accurate templates using cardboard or heavy paper before transferring the pattern to your tile. For circular cuts around pipes, use a tile drill bit to create a hole slightly larger than the pipe diameter, allowing for expansion and finishing with silicone sealant.
Tile chipping during cutting frustrates many DIYers. To minimise this risk, ensure your cutting equipment is appropriate for your tile material and in good condition. Score ceramic tiles firmly but not excessively, and always cut with the glazed side up. For porcelain and natural stone, slower cutting speeds with a quality wet saw typically yield cleaner results.
Grout-Related Issues
Discoloured or inconsistent grout ruins the appearance of otherwise well-installed tile. Prevent this by mixing sufficient grout for the entire project at once (or at least entire visible sections) and maintain consistent water ratios. When working with highly absorbent tiles, pre-seal them or dampen them slightly before grouting to prevent premature water absorption from the grout.
Cracking grout usually indicates movement in the substrate or improper mixing. Ensure adequate expansion joints around room perimeters and at material transitions. For areas subject to movement or vibration, consider flexible additives in grout or opt for flexible grout products designed specifically for such applications.
Grout haze – a cloudy film remaining on tiles after grouting – often results from inadequate cleanup. Remove it by waiting until grout begins to firm (usually about 30 minutes after application), then wiping with a barely damp sponge in diagonal strokes across grout lines. For stubborn haze that appears days later, specialised grout haze removers can effectively restore tile clarity.
By anticipating these common challenges and understanding their solutions, you’ll be better equipped to handle the inevitable surprises that arise during your floor tiling project, resulting in a finished installation that meets professional standards.
Frequently Asked Questions
What are the different types of floor tiling materials?
Tile flooring materials include ceramic, porcelain, natural stone (like marble and granite), glass, and resilient materials such as vinyl or cork. Each material has unique properties affecting durability, water resistance, and maintenance.
How do I prepare my subfloor for tiling?
Ensure your subfloor is clean, dry, and level before installation. Repair any damage and consider using self-levelling compounds for uneven areas. For wooden subfloors, install cement backer board for stability.
What factors should I consider when choosing a tile layout?
When selecting a tile layout, consider standard patterns such as straight, offset, herringbone, or diagonal. Each layout affects the installation complexity and visual appeal, so aim for a balanced design while minimising awkward cuts.
How can I troubleshoot uneven tiles after installation?
If you notice uneven tiles or lippage after installation, check for subfloor irregularities. You might need to remove affected tiles to adjust the adhesive bed or repair the subfloor before reinstallation for a flat result.
Transform Your Home with the Right Floor Tiles
Are you overwhelmed by the complexities of floor tiling? From choosing the perfect tile types to achieving a flawless subfloor preparation, the journey can feel daunting. Many aspiring DIYers face challenges like uneven surfaces or the intricacies of selecting a tile layout that enhances visual balance, particularly in high-traffic areas. Sound familiar?
!.png)
At Hyperion Tiles, we believe that transforming your space shouldn’t come with a headache. That’s why we offer a comprehensive range of high-quality tiles—from durable ceramic and porcelain to stunning natural stone options—along with expert advice to guide you every step of the way. Don’t let confusion hold you back! Dive into our user-friendly website at hyperiontiles.co.uk to explore tile options tailored to meet your aesthetic and functional needs. Start your journey today, and let your home’s transformation begin!
Share:
Understanding Tile Durability: A Simple Expert Guide
Discover Luxury Trends in Flooring: Expert Design Tips